Back-button Focus Explained — A Simple Guide For Photographers
Back-Button Focus Explained Why I Use It 100% of the Time
If you’ve ever missed a shot because your camera focused on the wrong thing or refocused right when you didn’t want it to you’re not alone. That used to happen to me too.
Then I switched to back-button focus. And honestly? I never went back. I use it 100% of the time now, whether I’m photographing sports, concerts, dance performances, travel scenes, or everyday moments. It gives me more control, faster response, and a lot more confidence when the action heats up.
If you’ve never tried it, this guide will explain it simply so you can set it up and start using it today.
First — What Is Back-Button Focus? (Simple Explanation)
Normally:
• Half-press the shutter button → camera focuses
• Fully press → photo is taken
With back-button focus:
• A button on the back focuses (usually AF-ON)
• The shutter button ONLY takes the picture
That’s it. Simple change. Big difference.
This means your camera stops trying to refocus every time you take a shot.
Why This Helps — Especially for Beginners
You Stop Fighting Your Camera
No more accidental refocusing right before the shot.
Action Photography Gets Easier
Sports, wildlife, concerts, dance hold the back button to track focus continuously, then fire away.
Focus Once, Shoot Many
Perfect for portraits, travel, street photography. Focus once, recompose, shoot freely.
It Builds Good Camera Habits
You start thinking intentionally about focus instead of letting the camera guess.
How To Set It Up (General Steps)
Every camera is slightly different, but the process is always similar:
- Turn OFF autofocus from the shutter button
- Assign autofocus to a rear button (AF‑ON or similar)
- Choose your autofocus mode: • Continuous/Servo for moving subjects
• Single/AF‑S for still subjects
TIP: The fastest help is YouTube. Just search:
"Your camera model + back-button focus"
Example: "Canon R6 back-button focus" or "Sony A7IV back-button focus."
You’ll usually find a step-by-step video in minutes.
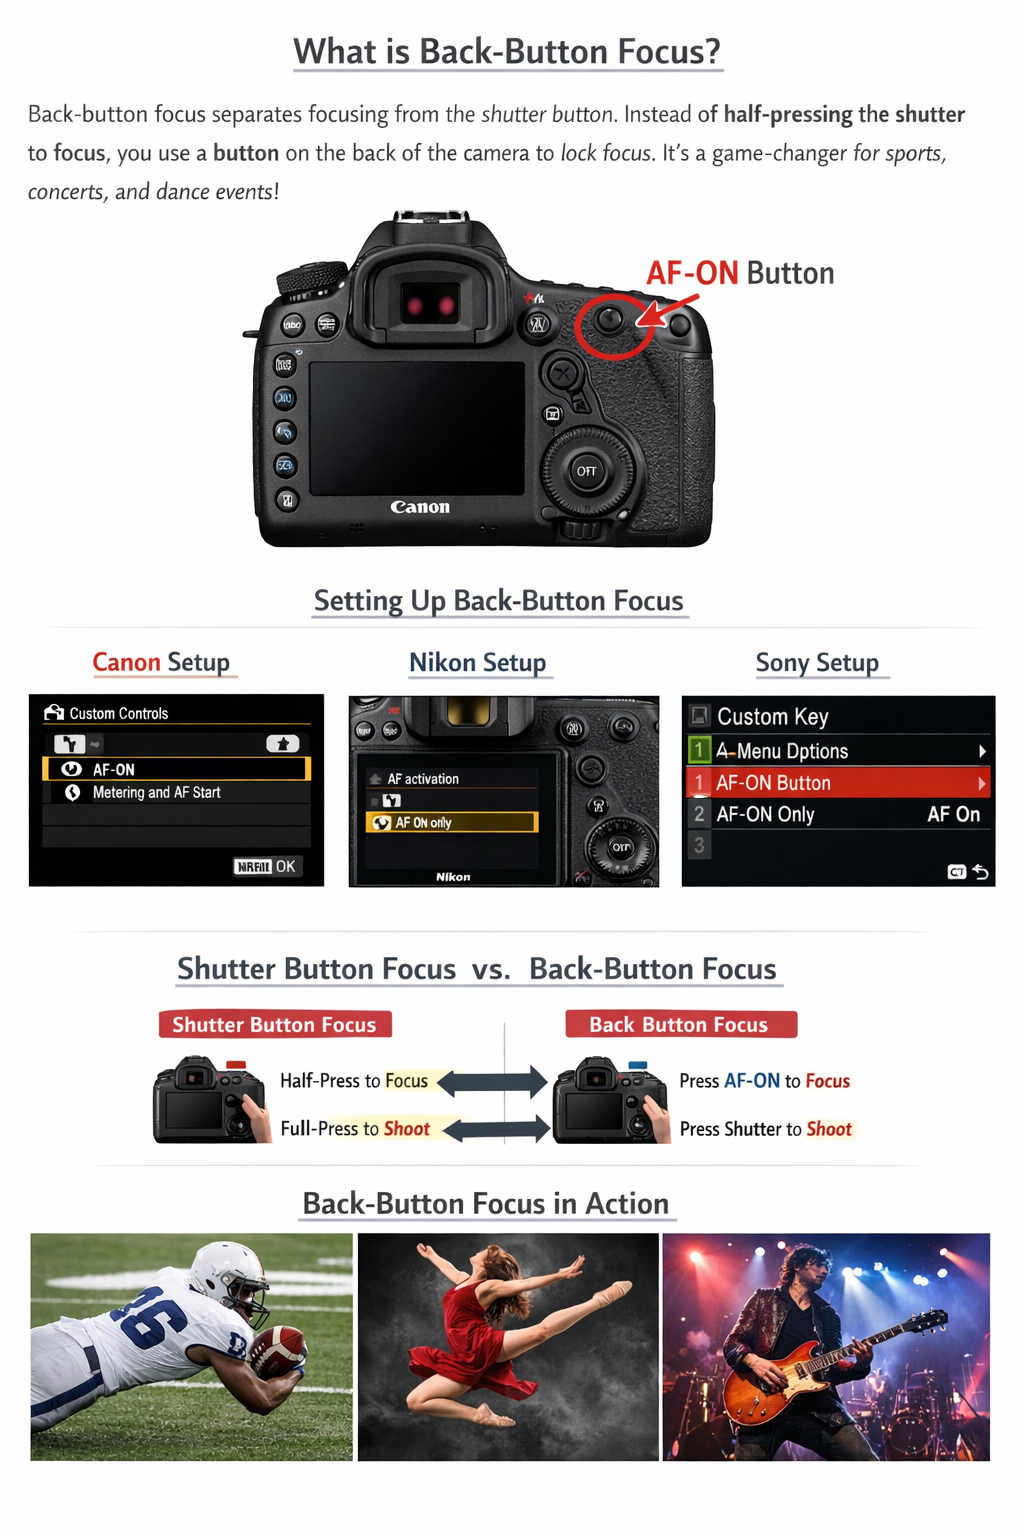
Canon Setup (Typical Method)
- Go to Custom Functions or AF Menu
- Find "Custom Controls" or "Shutter Button/AF‑ON"
- Set shutter button to Metering Only
- Assign AF‑ON button to autofocus
Done.
Press AF‑ON to focus. Press shutter to shoot.
Nikon Setup (Typical Method)
- Open Custom Settings Menu
- Find Autofocus Activation
- Disable AF from shutter button
- Assign AF‑ON or AE‑L/AF‑L button to focus
Many Nikon sports shooters swear by this setup.
Sony Setup (Typical Method)
Sony menus look complicated but don’t worry:
- Go to Custom Key/Button Assignment
- Assign AF‑ON to a rear button
- Turn off AF with shutter in AF settings
After that, it works just like Canon and Nikon.
How I Personally Use It
I rely on back-button focus constantly because it helps me:
• Track athletes without focus hunting
• Deal with tricky stage lighting at concerts
• Capture fast dance performances cleanly
• Shoot travel and events without hesitation
Once it becomes muscle memory, it actually feels easier than the old way.
Adjustment Tips (Important)
Expect a short learning curve. Totally normal.
Here’s what helps:
• Practice on casual shoots first
• Give it about a week
• Don’t panic if it feels strange initially
• Keep continuous AF on for moving subjects
Most photographers who switch stick with it.
Final Thoughts
Back-button focus isn’t mandatory. Great photos were made long before it existed.
But if you want more control, faster response, and less focus frustration — it’s absolutely worth trying.
And honestly, once you get comfortable with it, you may never go back either.
Try It This Week (Call To Action)
Set it up. Give yourself a few shoots to adjust.
Then tell me what you think.
And if you found this helpful, share it with another photographer who might benefit.
More tips, workshops, and photo adventures coming soon.
— Ron Wyatt